 |
Benefits Of Using Manual Mode On Your DSLR
|
|
"Manual mode (M) and learning to use it on your D-SLR is one of the best ways to help take your photography to the next level"
It’s actually quite simple to use, and once you’ve learned it you’ll be taking spectacular pictures that were not possible using the automatic modes.Many photographers, including myself, use manual virtually 100% of the time. I actually find it much easier to use this mode than any of the other modes.
So what exactly is Manual mode?
Manual is the setting on your camera that allows you to choose the exact shutter speed, aperture, and ISO for the photo.In any of the other automatic modes, like "Aperture Priority" (Av), "Shutter Priority" (Tv), or "Program" (P), the camera is choosing at least one of those settings for you based on a guess as to "what it thinks" you like. The end of that last sentence provides a hint as to why Manual mode is often the best choice...
Why is Manual mode the best choice in many situations?
It’s because in any of the automatic modes, the camera is taking a guess as to what you want the picture to look like. Every time you press the shutter button, it takes an educated guess at the exposure based on what the camera is pointed at.This guess is based on what the "meter" inside the camera sees. (I’ll explain more about the meter later on in this article, and exactly how it works.)
If you don’t like the guess the camera makes, you can begin to try to override it using things like "Exposure Compensation", but once you start doing that, you’re practically using Manual mode at that point, except you’re fighting the camera’s decisions.
This is why I stated above that I find it easier to use Manual mode in the first place. Here’s a simple analogy I like to use:
Which is easier?: Driving a car where you control both the steering and the gas pedal (or) Driving a car where you control the steering and a friend controls the gas pedal, and if you don’t like the speed your friend chooses, you have to start communicating with them to slow down or speed up and hope they get it right?
I think most people would just rather control both! Just because you’re controlling both the steering AND the gas pedal while driving, doesn’t make it harder...it actually makes it EASIER.
The same holds true for using Manual mode on your camera.
What does the Meter do?
Let’s talk a little bit about the camera’s meter. The meter is the part of your camera that looks at the scene you’re photographing and guides you to what it believes is a proper exposure.In the automatic modes, it sets the exposure for you by choosing the shutter speed and/or aperture.
In manual mode, you can "look at" the meter by looking in the viewfinder to see the camera’s guess at the exposure, however the camera will not actually change the settings for shutter speed or aperture. Here is why the automatic modes are not the best modes to use:
When you take a picture on Auto mode, the computer chip inside a camera (the meter) measures the light in order to determine how bright to make the photo, but it has no idea what it is looking at. It takes a guess.
The computer is specifically set to take all pictures at a "medium brightness" level because "most" scenes we encounter are taken in medium lighting (not too dark, not too bright). So it automatically selects a shutter speed and aperture that will result in a medium-brightness photo.
While this may work in some cases, it definitely does not work in all cases. If you always used Auto mode for every photo you took, there would be many photos incorrectly exposed.
The two classic examples use to illustrate this are the polar bear in the snow and the black cat in the coal mine.
If you used automatic mode and tried to take a picture of a polar bear in the snow, the meter would say "wow, this scene is extremely bright and I need to make it "medium"-brightness, so I better darken the photo" and what you wind up with is a photo of gray snow and a gray polar bear, rather than white.
Similarly, if you tried to take a picture of a black cat in a coal mine, the meter would say "OK, this scene is very dark, and I need to make it "medium"-brightness, so I will brighten up the photo" and you wind up with a gray cat in a gray coal mine.
These are of course two silly examples used to illustrate the point, but they do apply to you every time you take out your camera.
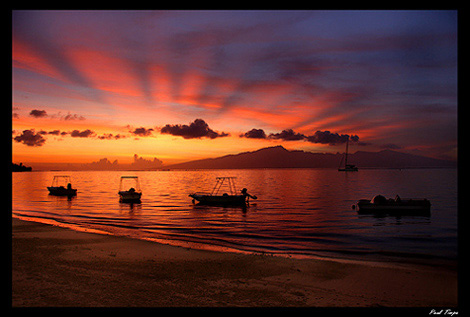
For example, many people wonder why when they take a sunset photo, they can never capture the true beauty or deep colors of the sunset.
The reason is because of the "black cat" example above. During a sunset, the sky can actually go fairly dark, except right where the sun is. The rest of the sky may be a deep blue with some beautiful oranges and reds.
The camera’s meter says "this scene is very dark, I’d better brighten it up to make it "medium"-brightness" and that’s how you lose your beautiful sunset and wind up with a very bright picture of a white/gray sky rather than the incredible sunset in front of you.
 |
How does Manual mode solve this problem?
It’s simple – YOU choose the shutter speed and aperture that results in a beautiful photo of the sunset colors.You completely ignore the meter and set the camera in a way that records the sunset properly. Sure you can use the meter as a starting point if you like, but you’ll ultimately wind up choosing settings that are likely drastically different than what the camera would have chosen.
That’s a good thing, because now you will have the photo you want.
Once you’ve chosen the settings that work for the photo, you can leave the settings for the entire duration of the sunset, and you know you’ll get an accurate representation of the whole event over time.
If your camera was on automatic, every picture might look almost identical, even as the sun continued to set – here’s why:
Let’s say you used the automatic mode "Aperture Priority" and set it to F16 for the sunset. It’s 5pm and the sun starts to set. The camera chooses a shutter speed of 1/100th second.
Several minutes later, the sky is darker because the sun has set more. Now the camera adjusts its shutter speed to 1/50th of a second to brighten it up – remember, its goal on Auto mode is for a medium brightness photo every time.
Several minutes later, it’s even darker and the camera takes the picture at 1/25th second. When you’re done, you’ll have three virtually identical shots with the sun in a different position.
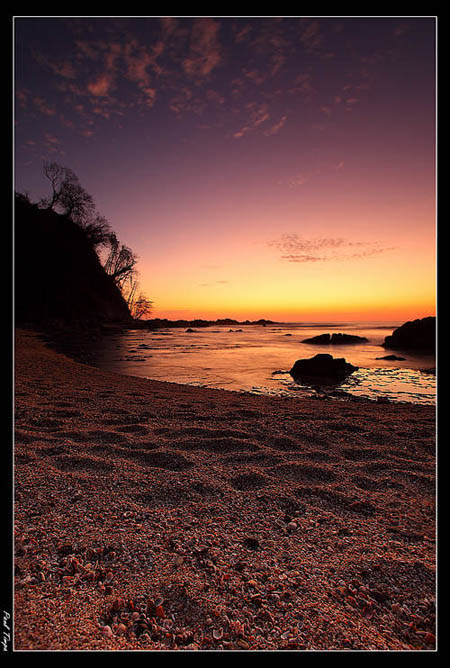
In real life, the sky would have gotten a beautiful deep purple, as the night fell, yet in your pictures, none of this would be reflected. You’d have three identical pictures of medium brightness. Probably not what you want.
Many people would say that Exposure Compensation is the way they get around the problem of the "medium" brightness dilemma. While this may help for one single photo, it is not a solution.
Exposure compensation is simply "offsetting" the camera’s guess by a certain amount – you’re still saying to the camera "take a guess for me, but then make the photo a little darker (or brighter) than your guess."
Either way, you’re still basing your photo on the camera’s guess. In our example above of the sun setting over time, you’d still wind up with three identical photos of the sunset, as the camera adjusted the shutter speed over time to compensate for the darkening sky.
 |
Now that you’re starting to develop a deeper understanding of the camera’s meter, and hopefully a feel for why manual mode may be better in many cases, let’s talk a little about some specific types of photography and how Manual mode can help.
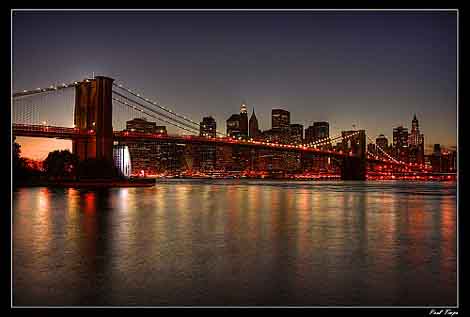
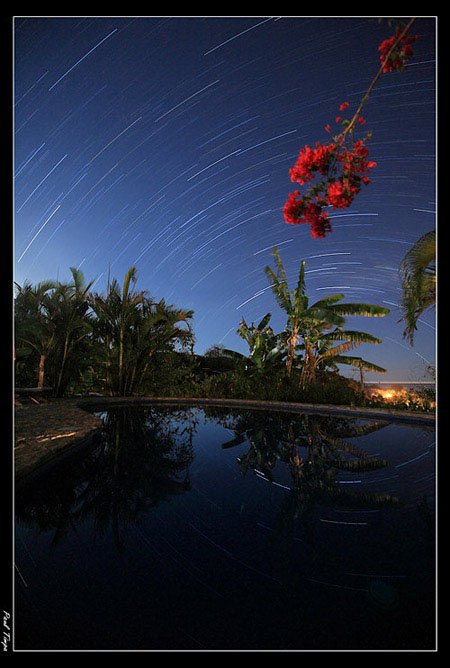
Night photography is one of the great examples of when to use Manual mode. When taking pictures at night of city skylines or stars or night scenes, your camera’s meter has very little use and does not work well.
Attempting to take night pictures on your camera’s Auto modes will almost always result in frustration, blurry shots, photos that are too bright, etc.
This is the perfect time to pull out the tripod (or rest the camera on something steady), put the camera on Manual mode, set an aperture appropriate for the scene, and then adjust the shutter speed until the exposure is correct and the brightness is just right.
If depth-of-field is not critical (for example, when taking a photo of a distant skyline), I suggest a starting point of ISO 100, an aperture of F5.6, and a shutter speed of 3 seconds. Take a test shot, see how bright or dark the photo is, and then adjust the shutter speed accordingly.
 |
Sports, action, or wildlife photography is another type of photography where you might want to use Manual mode.
This can be helpful when you’re trying to achieve consistency from shot-to-shot, when taking multiple shots in a row.
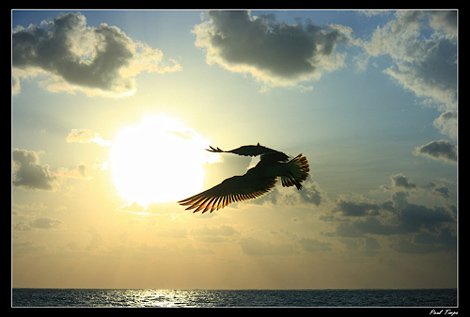
For example, let’s say I’m photographing some birds. The exposure / brightness of the bird itself may be what’s most important to me, regardless of the background.
I might set an aperture of F4 and a shutter speed of 1/1000th to capture the bird and freeze its motion. The F4 will ensure a nice blurred background, and 1/1000th will result in a good exposure for the bird.
Using this setup, the bird can fly or move around anywhere in the scene, and I can continue taking pictures knowing that the bird will look exactly the same in all the shots – perfectly exposed. That’s what I want.
If however, I had used Shutter Priority mode, I might get different exposures for the bird from shot-to-shot, which for me personally, is not what I’d want. Here’s why:
Let’s say you used Shutter Priority and set a shutter speed of 1/1000th of a second to freeze the movement of the bird. The bird is in front of some trees, and the camera chooses an aperture of F4 to expose the bird correctly.
A few seconds later, the bird moves a little, and instead of being in front of some trees, the bird is now in front of some bright flowers. The camera’s meter sees the bright flowers, thinks the scene is too bright now, and closes down the aperture to F8.
Now, not only do you have a picture of the bird that is two full-stops darker than the previous picture, but the depth-of-field of the whole photo has changed because the aperture has gone from F4 to F8.
Once again, this is probably not what you wanted.
Similarly, if you’re taking a series of photos of a football player running down a field, if you use shutter priority, the exposure of the football player will vary from shot-to-shot as he passes in front of various different backgrounds (maybe in one shot he’s in front of the crowd, and in the next shot he’s in front of a bright billboard).
The only way to achieve consistency is to use Manual mode. While there is intelligence in the meter that is supposed to help determine what you’re photographing to account for these problems, it is not always reliable.
 |
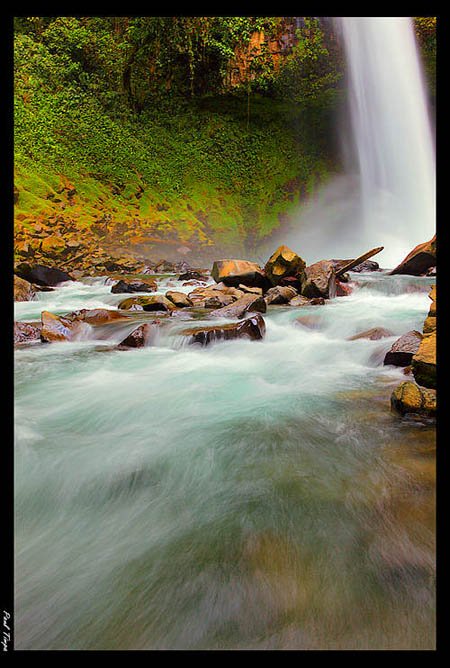
On the other end of the shutter speed spectrum, perhaps you’re shooting a waterfall.
You could use manual mode to choose a shutter speed of 2 seconds to get some beautiful blur on the water, and then choose an aperture to achieve the correct brightness.
If you used an automatic mode, like Shutter Priority, the aperture might change from shot to shot depending on whether the sun was peeking through the clouds at that particular moment when you took the shot.
If the scene got darker, the camera might open up the aperture so much that you’d lose the appropriate depth of field and wind up with a blurry photo.
I prefer the consistency of knowing exactly what I’m going to get. You can discover more about Landscape photography and realize your creative abilities at Digital Landscape Photography Adventure.
 |
So when might you want to use one of the automatic modes?
You may want to use an auto mode when time is of the essence. If an incredible scene quickly unfolds in front of you, you simply may not have time to adjust the shutter speed and aperture appropriately.In those cases, it may be worthwhile to just spin the mode dial to "P" and hope to get a decent exposure. Similarly, if you need to take several shots very quickly of a scene which has varying brightness levels, setting the camera to aperture priority with an appropriate aperture will allow you to take several shots quickly.
For example, if you’re with a group and have only a few moments to capture several images of a landscape from a hilltop, you may want to use aperture priority to snap several shots of the landscape from various angles, without having to set the shutter speed individually for each shot.
Except for these types of situations though, I almost always prefer the consistency of Manual Mode.
 |
Hopefully this article has shed some light on the benefits of using Manual Mode. Give it a try on your next outing and you too may see that you find it easier to use than the Automatic modes, and you’ll get better pictures as well.
For more tutorials and tips, please feel free to visit my blog and ask any questions at:
http://www.timpaphotography.com/blog
Best regards,
Paul Timpa
Paul Timpa is a New York based architectural and travel photographer. Copyright 2009, Paul Timpa
So what now?
If Paul has inspired you to get to know more about your camera and take your photography to the next level, then why not take an Online Photography Course.This in-depth photography training course was specially developed by a professional photography instructor and includes a full 90 day money-back guarantee.
Return from Manual Mode to Digital Photography Tips
Return from Manual Mode to Digital Photography Tricks
| Didn't find what you're looking for? Search here... |

Custom Search
|


